
wsl2
windows对linux的支持
安装wsl
-
如果电脑上删除了windows应用商店,可以用如下方法重新安装:
- Windows+x选A,以管理员身份运行WindowsPowerShell
- 输入命令
Get-AppxPackage -allusers | Select Name, PackageFullName,获取当前系统安装的所有应用。 - 在列表中找到名称为“Microsoft.WindowsStore”(即应用商店)的应用,然后复制右侧对应的包名称。
Microsoft.WindowsStore_11801.1001.6.0_x64__8wekyb3d8bbwe - 输入下列命令进行应用商店的重装(版本不同包名称也不同,下列命令看着替换一下自己的包名称就好了。):
Add-appxpackage -register "C:\Program Files\WindowsApps\Microsoft.WindowsStore_11801.1001.6.0_x64__8wekyb3d8bbwe\appxmanifest.xml" -disabledevelopmentmode - 打开开始菜单,应用商店已装回。
安装docker
curl -skSL https://mirror.azure.cn/repo/install-docker-ce.sh | sh -s -- --mirror AzureChinaCloud |
- 启动docker
sudo service docker start |
- 拉镜像
sudo docker pull nginx |
- 配置端口映射
sudo docker run --name nginx:latest -p 8080:80 -d nginx |
- 在windows访问
http://localhost:8080
图形界面
图形界面介绍
| xfce4图形界面 | 一是因为该界面安装耗费的空间小,不到1GB,具体的没截图,相比其它图形界面动辄2GB而 二是因为用该界面主要是有一个图形界面可以使用spacemacs |
更新源
- 更改源文件配置,更改中不能有空行
sudo cp /etc/apt/sources.list /etc/apt/sources.list.backup |
- 阿里云镜像
deb https://mirrors.ustc.edu.cn/ubuntu/ bionic main restricted universe multiverse |
- 更新
sudo apt-get update |
环境
- 安装xfce4图形界面
sudo apt install -y xfce4 |
- 安装xrdp
sudo apt install -y xrdp |
- 配置 xrdp 端口
sudo sed -i 's/port=3389/port=3390/g' /etc/xrdp/xrdp.ini |
-
这里面 3389 是默认配置,这里将其改为 3390 是避免和 windows 的端口冲突。因为两边的端口号是通的,在 wsl 中开一个 8080 端口的 WebServer,在 windows 可以直接访问。
-
配置 xsession,这一步其实是在告诉系统,开启桌面环境的时候开启什么桌面环境。
sudo echo xfce4-session >~/.xsession |
- 启动 xrdp
sudo service xrdp restart |
-
远程连接:在 win10 开始菜单中搜远程桌面,或按win+r 后输入mstsc
在计算机后面输入 localhost:3390 点击连接,用户名这里用root。首次连接可能需要较长时间。 -
注意事项:
- 如果WSL的Ubuntu系统关闭,如关机重启,会导致远程连接不上,此时需要先在Win10中打开Ubuntu的命令行界面,输入:
sudo service xrdp restart |
- 此时再远程连接,即可连接上。
wsl与windows相互访问文件
-
- windows:
c:\ - wsl:
/mnt/c/
- windows:
-
- 在windows位置:
C:\Users\%USERNAME%\AppData\Local\Packages\CanonicalGroupLimited.UbuntuonWindows_79rhkp1fndgsc\LocalState\rootfs\ - 由于linux文件夹不被建议访问,使用windows资源管理器容易造成wsl不可预知的问题,因为缺少VolFs所需要的额外信息
- 在windows位置:
问题汇总
Win10 2004 WSL2 ERROR: 0x800701bc
- uninstall the Linux kernel (or Windows Subsystem for Linux Update) by running this program
- installed the msi again from https://aka.ms/wsl2kernel
Error 0x80370102
- 安装条件检查
- 任务管理器->性能:查看Virtual machine,如果此处是no的,请更改bios设置
- 按照指南安装
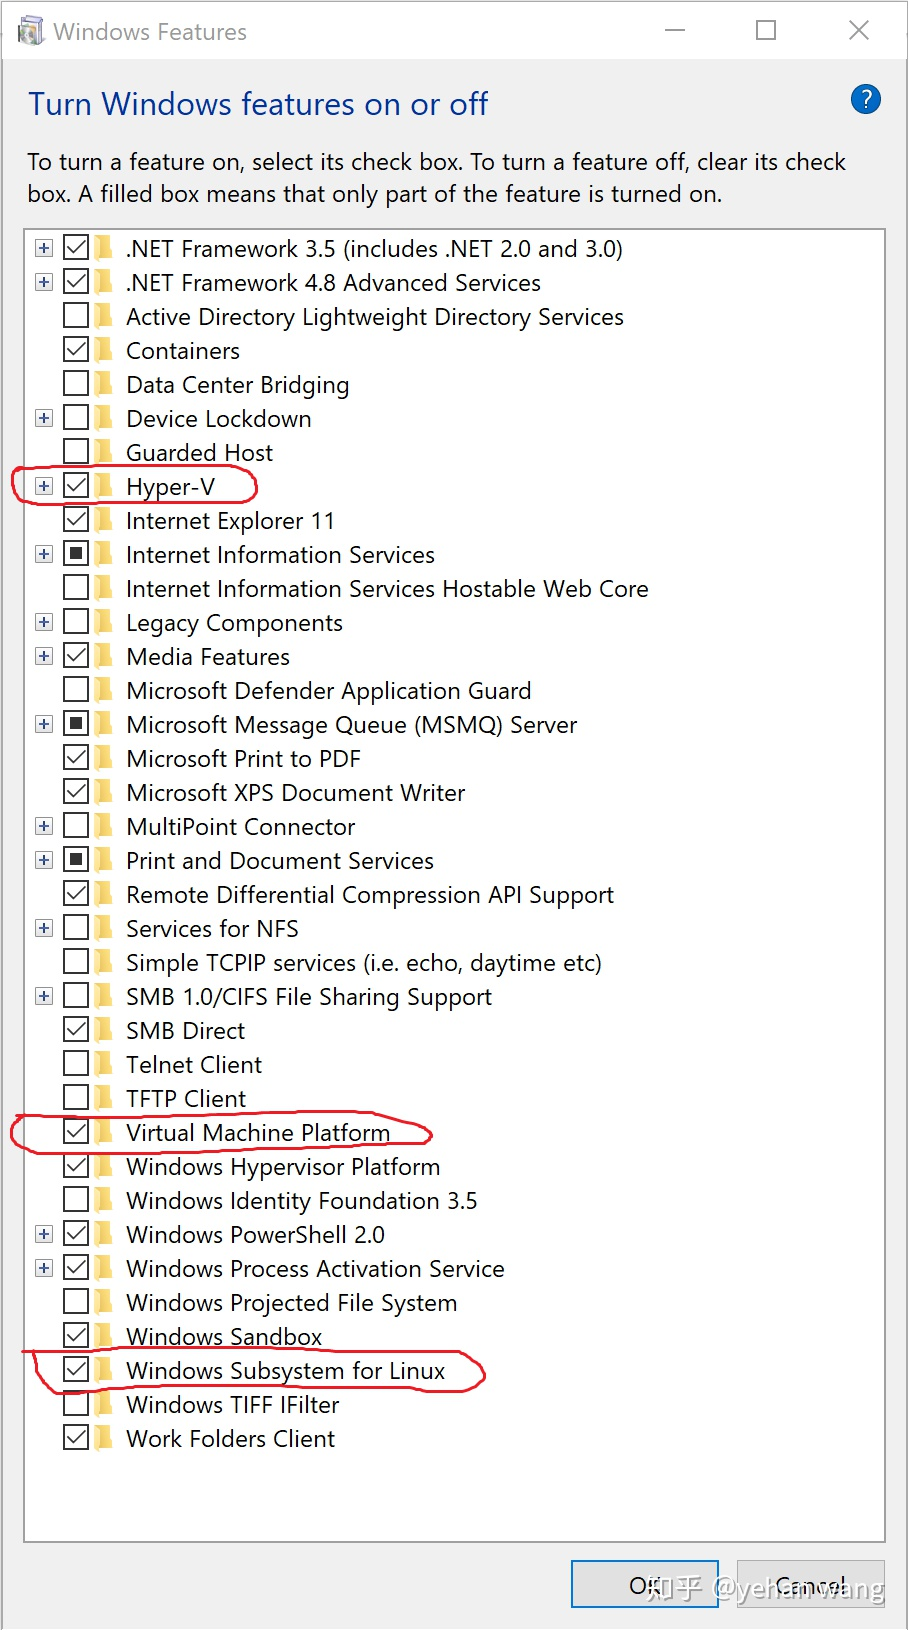
- 设置-》应用-》程序和功能-》启用或关闭windows功能
- 恢复到初始状态,然后转2,直到成功
Enable-WindowsOptionalFeature -Online -FeatureName Microsoft-Hyper-V -All |
- 图形界面黑屏
- 由于设置屏保,登录后黑屏,需要将屏保关闭
xset s off |